Text formatting determines how your text will look in your document. Making your text look better is very easy using the FCKeditor. We will start the guide through the text formatting with bold, italic, underlined fonts.
Contents
Bold, Italic, Underlined and Strike-through
You may also arrange the way you font looks like by choosing whether the font should be bold, italic, underlined or stroked through.
- To make your font bold press the
 on the toolbar.
 - If you want it to be italic press the
 on the toolbar .
 - For underlined press the
 on the toolbar.
 - And finally to strike a line through the text press
 on the toolbar.
Example:
If you choose any of this options you will learn that the button on the toolbar will highlight. If you want to disable the function press its button again. Of course you can mix these options as much as you want.
Example:
Notice that if you don't switch the underline option off the underline will go between your blanks.
Example:
The same thing happens when you use the strike through function.
Styles
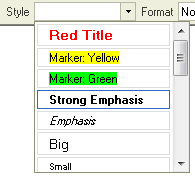
It is quite easy to make your text looking ugly or difficult to read by making lots of different formatting on it. Styles help on making all formatting uniform in the text. Each style option contains a predefined combination of formatting features, which have been defined by the web site developer. Be sure you have been instructed on how to properly use each of the available styles.
Styles are also a way to combine all the formatting function described in this page. They give you fast access to the common used text formats. For example: you don't have to change the font, its color, its background, its size. You simply peak a style you prefer from the Style menu and start typing.
It is the best way to change the text look.
Example:
Text Alignment
A paragraph of text can have its lines aligned to either of the sides of the document, as well as centering on it. You may also force the lines to take the entire space available in the document (like aligning to both sides at the same time).
To align your text at the left side of the editing area, press the ![]() button on the toolbar.
button on the toolbar.
Example:
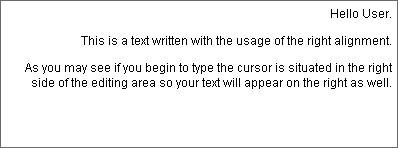
If you want instead to have the text aligned at the right side of the editing area, just press the ![]() button on the toolbar.
button on the toolbar.
Example:
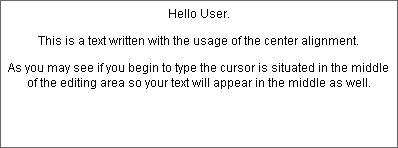
In order to align your text at the center of the document, press the ![]() on your toolbar.
on your toolbar.
Example:
The last option is the block alignment. If you want to activate it press ![]() on the toolbar. This function is much similar to the left alignment. You also begin typing from the left side of the screen. The difference instead can be noted when writing several lines of text. Each one will have the same length even though they don't have to have the same amount of words or letters. The lines will just expand and the text will be equally long so that the lines will end in the same place.
on the toolbar. This function is much similar to the left alignment. You also begin typing from the left side of the screen. The difference instead can be noted when writing several lines of text. Each one will have the same length even though they don't have to have the same amount of words or letters. The lines will just expand and the text will be equally long so that the lines will end in the same place.
Example:
Paragraph (Block) Format
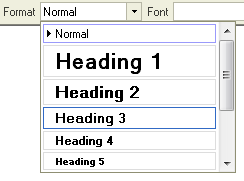
Another very important function which you will probably use in your text is the Format menu in the toolbar:
A format is used for organizing your text and to distinguish different parts of your text. For example if you want to start a new chapter or to put different categories and subcategories you use the format menu and choose different headings.
Example:
You can see headings also in this guide. Fonts, Layout and format, Styles are all headings used to divide this document into categories.
Fonts
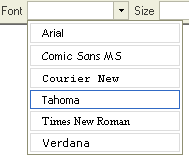
Fonts are kinds of style of writing. They determine how the letters of your text look like. The most common used fonts are "Times New Roman" and "Arial". They are used in most documents created in the world. You may say that they are very official fonts used in formal documents. If you wish to use a different font you are of course more than welcome to do so. To choose a font you want to type in access the font menu in your toolbar and click on the font you decided to use.
Example:
We encourage you to avoid overusing this feature. You can easaly produce a document that looks bad or difficult to read. Give preference to the Styles menu instead, which have been preciselly designed by your web side developer.
Text Size
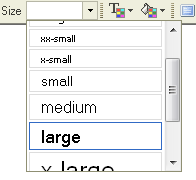
To change you font size open the "Size" menu in the toolbar. There you will find a range of sizes which were defined by your web site developer. To change the size of your font just choose one of the options.
Example:
As you can see you can have a very big variety of sizes.
Colors
The other option to make your text look different is changing the text color or its background color.
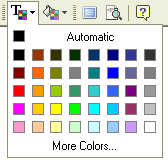
If you want to change your text color press the text color button ![]() . Several colors will appear in a menu. If you are not satisfied with the colors available in that panel click "More colors...".
. Several colors will appear in a menu. If you are not satisfied with the colors available in that panel click "More colors...".
To choose the color you want to use, just click on it.
Example:
You may also change the text background color using the ![]() button. Again you will find a range of colors the same ones as in the text color. Click on the color you want to choose.
button. Again you will find a range of colors the same ones as in the text color. Click on the color you want to choose.
Example:
You may also mix the colors of your text and the background.
Subscript and Superscript
Subscript and superscript are usually used for mathematical needs. Subscript is a way to put an index to a letter or to a number. The subscript has a smaller font than the normal text. To activate subscript you must press the ![]() button on the toolbar.
button on the toolbar.
Example:
As you can see you can use either a number in a subscript or a text.
The superscript work in the same way as the subscript but instead of placing the index in the bottom you place it in the top. This function is usually used in mathematical equations to write the "to the power of" function. You can access it from the toolbar using the ![]() button
button
Example:
You can also mix these two functions:
Example:


