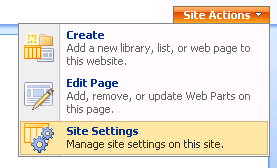
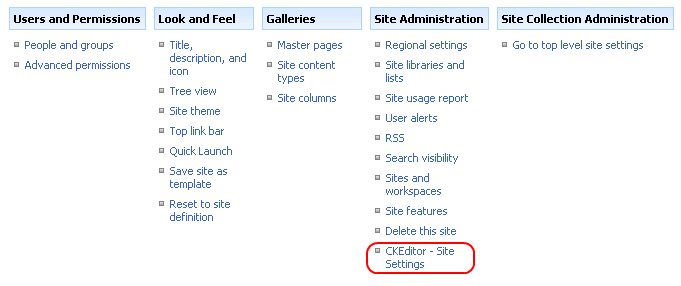
Each SharePoint site that is a part of a site collection might be configured separately according to your needs. To configure CKEditor for SharePoint for a site, go to the Site Actions menu for the site, and select the Site Settings option.
The Site Settings page that will open lets you configure the look and feel of CKEditor for an individual site. From the Site Administration section choose the CKEditor – Site Settings option.
To enable CKEditor for SharePoint on a selected site, choose Yes in the Enable CKEditor section.
If you want to disable it, choose No.
CKEditor settings for a site can be inherited from the site collection or set independently for each site.
To inherit the site collection settings, choose Yes in the Inherit settings from site collection section.
If you want to set site settings independently of the site collection, choose No.
You can now configure CKEditor for SharePoint for an individual site independently of the site collection it belongs to.
To change CKEditor settings, enter them into the Configuration section and click the OK button.
Note, however, that at any time you can easily return to site collection settings by clicking the Load settings from site collection button. You can also reset all settings to their default values by choosing the Reset all settings to default values button.


