Contents
Links and E-mails
To insert a link to an URL address, anchor or an e.mail press ![]() button on the toolbar. A popup window called "Link" will appear.
button on the toolbar. A popup window called "Link" will appear.
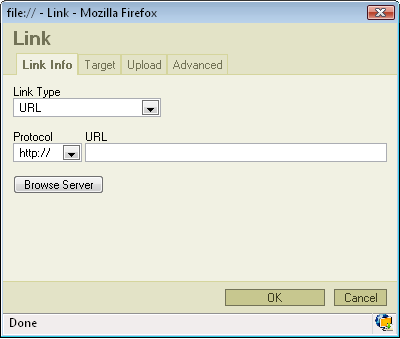
- Link Type: specifies the type of link you want to put in the document. You can choose from "URL", "Link to anchor in the text" or "E-mail". Depending on which option you will choose different options and bookmarks will appear in the window. We will start from the Link Type: URL.
URL
Link Info
If you chose Link Type: URL the same option as in the above picture will appear.
- Protocol: specifies the type of protocol you want to use for your link. You can choose from "http://", "https://","ftp://", "news://" or "<other>".
- URL: specifies the address you want your link to refer to.
Press "OK" and the link will appear in your document.
Target
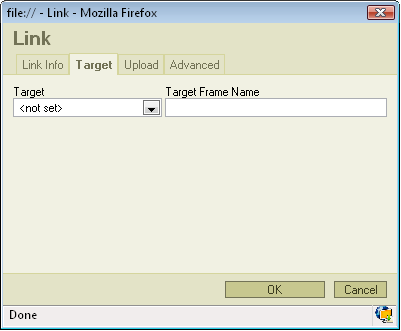
The second bookmark of the window refers to "Target":
- Target: set's the target of your link. Specifies in what kind of a window a link will appear. You may choose from "<frame>", "New Window" ( _blank ), "Topmost Window" ( _top ), Same Window ( _self ), Parent Window ( _parent).
- Target Frame Name: in this window you will find the name of the option you have selected in "Target"
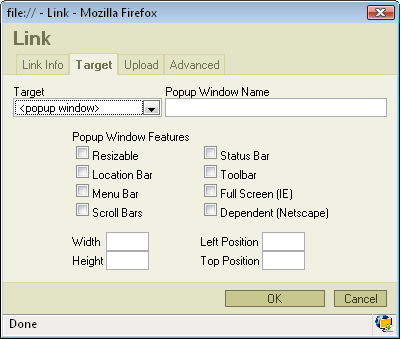
In "Target" you may also choose the <popup window> option. After clicking it you will find that the options in the bookmark have changed:
- Popup Window Name: specifies the name of your popup window.
- Popup Window Features: you can check or uncheck several option regarding to the appearance of the popup window. Some of the options are depending on which browser you're using.
- Width: specifies the width of the window the linked address will appear in.
- Height: specifies the width of the window the linked address will appear in.
- Left Position: sets the horizontal position of the window the linked address will appear in, starting from the left side of your screen.
- Top Position: sets the vertical position of the window the linked address will appear in, starting from the top of your screen.
Pressing "OK" will insert the link in your document.
Upload
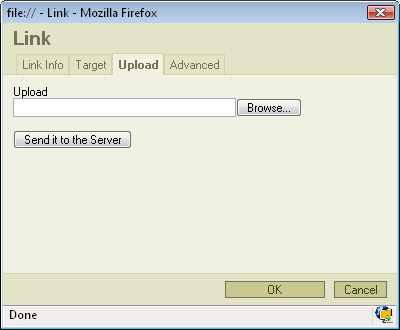
The third bookmark refers to "Upload":
- Upload: specifies the location of the file you want to upload. If you don't want to type it manually press "Browse...".
- Send it to Server: sends the file you specified in "Upload" to the server.
Link to anchor in the text
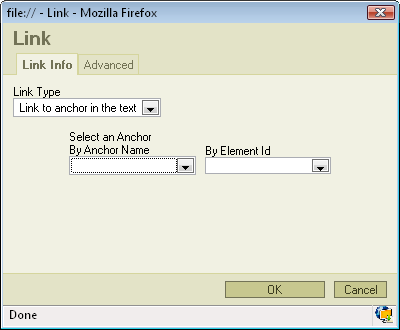
If you chose Link Type: Link to anchor in the text new options will appear in the Link Info bookmark.
You may select the link to the anchor in two ways.
- By Anchor Name: selects the anchor by name you have previously specified in anchor properties.
- By Element Id: selects the anchor by Id.
Pressing "OK" will insert the link in your document.
E-mail
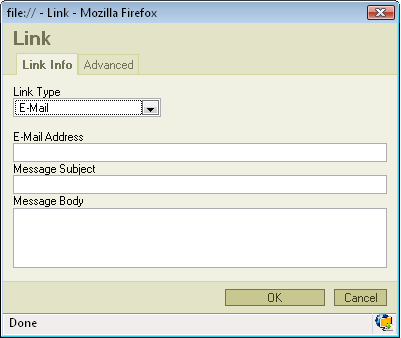
If you chose Link Type: E-mail new options will appear in the Link Info bookmark:
- E-mail Address: specifies the e-mail address to which you want the link to refer to.
- Message Subject: specifies the subject of the message which will be sent to the e-mail address.
- Message Body: specifies the text of the message which will be sent to the e-mail address.
Press "OK" to insert the link in your document.
Advanced options
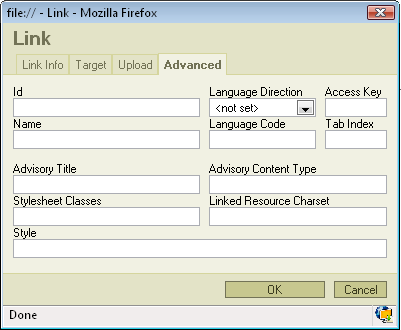
Whatever Link Type you will choose one bookmark will remain the same. It is the last bookmark called "Advanced":
- Id: specifies the ID of the link.
- Language Direction: sets the language direction from left to right ( LTR ) or from right to left ( RTL ).
- Access Key: sets up an access key to the link.
- Name: specifies the link name.
- Language Code: defines the code of the language e.g. en, pt, pt
- Tab Index: defines the tab index.
- Advisory Title: specifies the description of the target object.
- Advisory Content Type: specifies the MIME type of the target object.
- Stylesheet Classes: specifies the name of the CSS class.
- Linked Resource Charset: specifies the charset of the target object.
- Style: defines the style
Press "OK" to insert the link.
Anchors
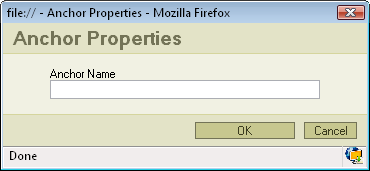
To insert an anchor in the text place your cursor before the text or section you want to the anchor to refer and press ![]() button on the toolbar. A popup window called "Anchor Properties" will appear:
button on the toolbar. A popup window called "Anchor Properties" will appear:
- Anchor Name: specifies the anchor name. You will be referring to this name while linking to the anchor.
Press "OK" and the anchor will appear in your document.
