(Article contents added) |
(Article proof-read) |
||
| (3 intermediate revisions by the same user not shown) | |||
| Line 1: | Line 1: | ||
| + | __TOC__ | ||
{{#CUSTOMTITLE:Using the CKEditor Web Part}} | {{#CUSTOMTITLE:Using the CKEditor Web Part}} | ||
| − | After you enable '''CKEditor for SharePoint''' for a site collection or individual site, CKEditor will automatically replace the default rich text editor for various content types, including a blog post, or a calendar appointment. Furthermore you can also use CKEditor to edit a page that is built with SharePoint web parts. This option lets you add and format content inserted into your pages quickly and efficiently, by using the numerous CKEditor toolbar features. | + | After you enable the '''CKEditor for SharePoint''' feature for a site collection or individual site, CKEditor will automatically replace the default rich text editor for various content types, including a blog post, or a calendar appointment. Furthermore you can also use CKEditor to edit a page that is built with SharePoint web parts. This option lets you add and format content inserted into your pages quickly and efficiently, by using the numerous CKEditor toolbar features. |
| − | To use the '''CKEditor Web Part''', go to the '''Site Actions''' menu | + | To use the '''CKEditor Web Part''', go to an existing web part page or create a new one using the '''More Options''' page from the '''Site Actions''' menu, and choose the '''Web Part Page''' type from the '''Pages and Sites''' section. |
| + | |||
| + | [[Image:CKESP2010_webpart00.png|frame|center|Web Part Page created in SharePoint 2010]] | ||
| + | |||
| + | |||
| + | When the web part page is ready, go to its '''Site Actions''' menu, and choose the '''Edit Page''' option. | ||
[[Image:CKESP2010_webpart01.png|frame|center|Edit Page option in the Site Action menu of SharePoint 2010]] | [[Image:CKESP2010_webpart01.png|frame|center|Edit Page option in the Site Action menu of SharePoint 2010]] | ||
| + | == Adding the CKEditor Web Part == | ||
In order to add the '''CKEditor Web Part''' you need to choose the '''Add a Web Part''' option for the desired web part zone. | In order to add the '''CKEditor Web Part''' you need to choose the '''Add a Web Part''' option for the desired web part zone. | ||
| Line 12: | Line 19: | ||
| − | The '''All Web Parts''' list from the '''Add Web Parts''' page should contain an entry for '''CKEditor for SharePoint'''. After you select the '''CKEditor Web Part''' from the list click the '''Add''' button. | + | The '''All Web Parts''' list from the '''Add Web Parts''' page should contain an entry for '''CKEditor for SharePoint'''. After you select the '''CKEditor Web Part''' from the list, click the '''Add''' button. |
[[Image:CKESP2010_webpart03.png|frame|center|CKEditor Web Part tool pane in SharePoint 2010]] | [[Image:CKESP2010_webpart03.png|frame|center|CKEditor Web Part tool pane in SharePoint 2010]] | ||
| Line 21: | Line 28: | ||
<ins>'''Important note:'''</ins> When '''CKEditor for SharePoint''' is in trial mode, the '''CKEditor Web Part''' contains a "Demonstration version" note and copyright information. | <ins>'''Important note:'''</ins> When '''CKEditor for SharePoint''' is in trial mode, the '''CKEditor Web Part''' contains a "Demonstration version" note and copyright information. | ||
| − | [[Image:CKESP2010_webpart04a.png|frame|center|CKEditor Web Part in | + | [[Image:CKESP2010_webpart04a.png|frame|center|CKEditor Web Part in demonstration mode in SharePoint 2010]] |
| Line 29: | Line 36: | ||
| + | == Modifying the CKEditor Web Part == | ||
To modify the content of the '''CKEditor Web Part''', open the web part tool pane by clicking the "open the tool pane" link or choosing the '''Edit Web Part''' option from the drop-down menu. | To modify the content of the '''CKEditor Web Part''', open the web part tool pane by clicking the "open the tool pane" link or choosing the '''Edit Web Part''' option from the drop-down menu. | ||
| Line 34: | Line 42: | ||
| + | === Web Part Properties === | ||
The '''Appearance''', '''Layout''', and '''Advanced''' options let you customize the look and feel of the '''CKEditor Web Part'''. Click the [[Image:plusicon.png|plus]] icon to expand a configuration category and gain access to appropriate settings. | The '''Appearance''', '''Layout''', and '''Advanced''' options let you customize the look and feel of the '''CKEditor Web Part'''. Click the [[Image:plusicon.png|plus]] icon to expand a configuration category and gain access to appropriate settings. | ||
| Line 51: | Line 60: | ||
| + | === Web Part Content === | ||
When you are happy with your '''CKEditor Web Part''' customization, you can start adding content in the WYSIWYG editing area. The text entered in the editor can be formatted using all available toolbar buttons. Depending on the system settings, you might also add other content types to your web part, including images, links, emoticons, or Flash objects. When you are ready, click the '''OK''' button to save the changes. | When you are happy with your '''CKEditor Web Part''' customization, you can start adding content in the WYSIWYG editing area. The text entered in the editor can be formatted using all available toolbar buttons. Depending on the system settings, you might also add other content types to your web part, including images, links, emoticons, or Flash objects. When you are ready, click the '''OK''' button to save the changes. | ||
| Line 56: | Line 66: | ||
| − | The '''CKEditor Web Part''' should now show | + | The '''CKEditor Web Part''' should now show content added in the '''Edit Web Part''' window, edited and formatted in CKEditor. |
[[Image:CKESP2010_webpart10.png|frame|center|CKEditor Web Part content in SharePoint 2010]] | [[Image:CKESP2010_webpart10.png|frame|center|CKEditor Web Part content in SharePoint 2010]] | ||
Latest revision as of 15:09, 25 November 2010
Contents
After you enable the CKEditor for SharePoint feature for a site collection or individual site, CKEditor will automatically replace the default rich text editor for various content types, including a blog post, or a calendar appointment. Furthermore you can also use CKEditor to edit a page that is built with SharePoint web parts. This option lets you add and format content inserted into your pages quickly and efficiently, by using the numerous CKEditor toolbar features.
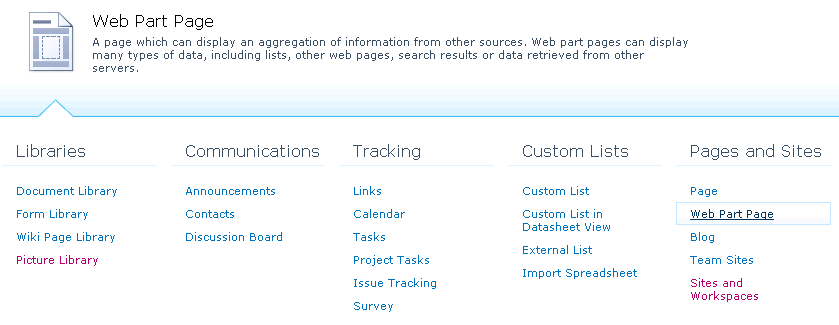
To use the CKEditor Web Part, go to an existing web part page or create a new one using the More Options page from the Site Actions menu, and choose the Web Part Page type from the Pages and Sites section.
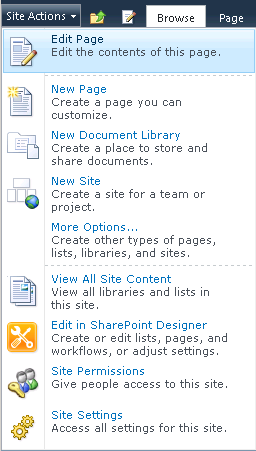
When the web part page is ready, go to its Site Actions menu, and choose the Edit Page option.
Adding the CKEditor Web Part
In order to add the CKEditor Web Part you need to choose the Add a Web Part option for the desired web part zone.
The All Web Parts list from the Add Web Parts page should contain an entry for CKEditor for SharePoint. After you select the CKEditor Web Part from the list, click the Add button.
The CKEditor Web Part will now be added to the page in the appropriate web part zone.
Important note: When CKEditor for SharePoint is in trial mode, the CKEditor Web Part contains a "Demonstration version" note and copyright information.
Once you purchase a product licence and activate your copy of CKEditor for SharePoint, the copyright message will disappear.
Modifying the CKEditor Web Part
To modify the content of the CKEditor Web Part, open the web part tool pane by clicking the "open the tool pane" link or choosing the Edit Web Part option from the drop-down menu.
Web Part Properties
The Appearance, Layout, and Advanced options let you customize the look and feel of the CKEditor Web Part. Click the ![]() icon to expand a configuration category and gain access to appropriate settings.
icon to expand a configuration category and gain access to appropriate settings.
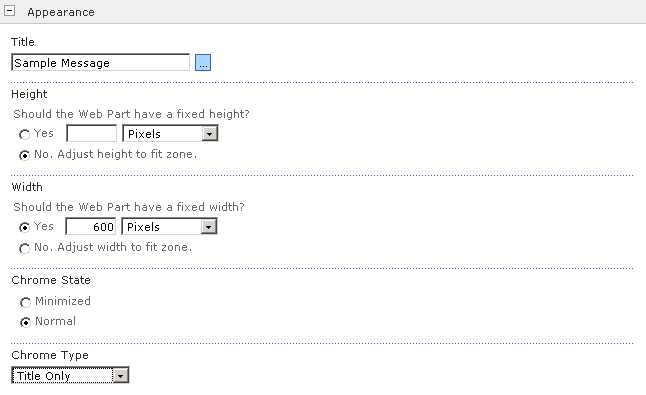
The Appearance category lets you change the title of the web part, replacing th default CKEditor Web Part title. If the web part should have a fixed size, use the width and height settings. You can also control the chrome appearance, minimizing it or displaying without the title and/or border.
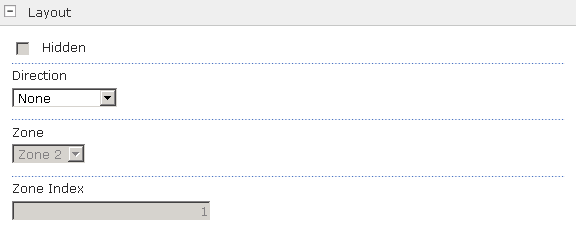
The Layout category lets you hide the web part, move it to a different zone, or change its position within the zone. You can also set the direction of the web part, choosing between left to right and right to left.
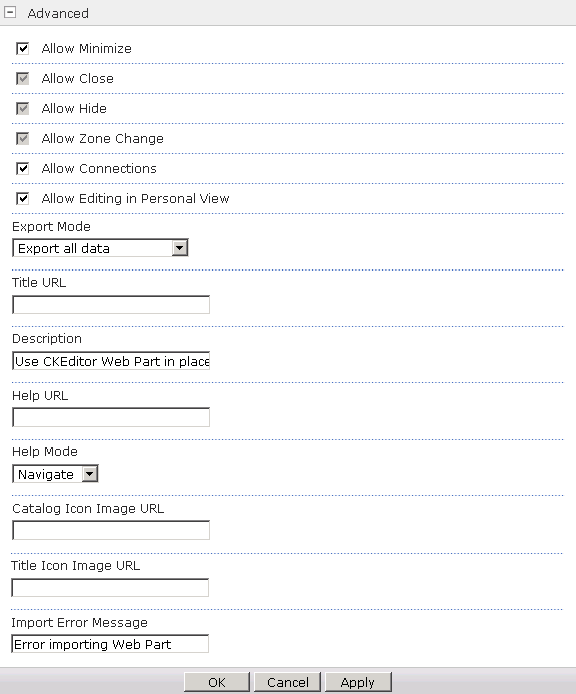
The Advanced category is directed at administrators and contains various permission settings that let you control whether the user will be able to modify the web part, its display, and position. You can also change the default description of the web part, the import error message, URLs, and icons.
Web Part Content
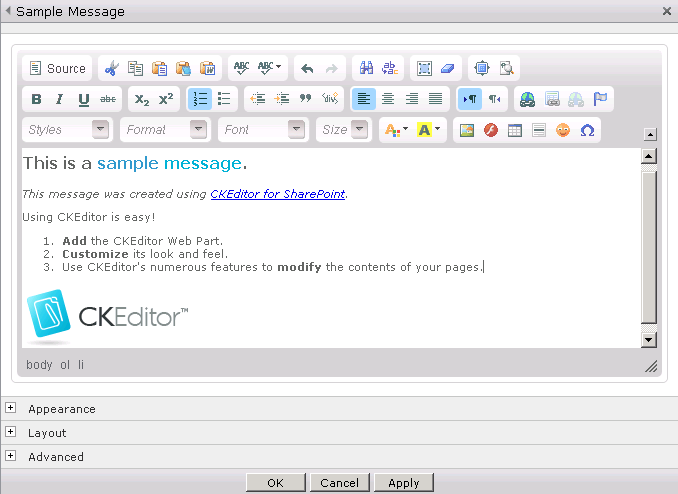
When you are happy with your CKEditor Web Part customization, you can start adding content in the WYSIWYG editing area. The text entered in the editor can be formatted using all available toolbar buttons. Depending on the system settings, you might also add other content types to your web part, including images, links, emoticons, or Flash objects. When you are ready, click the OK button to save the changes.
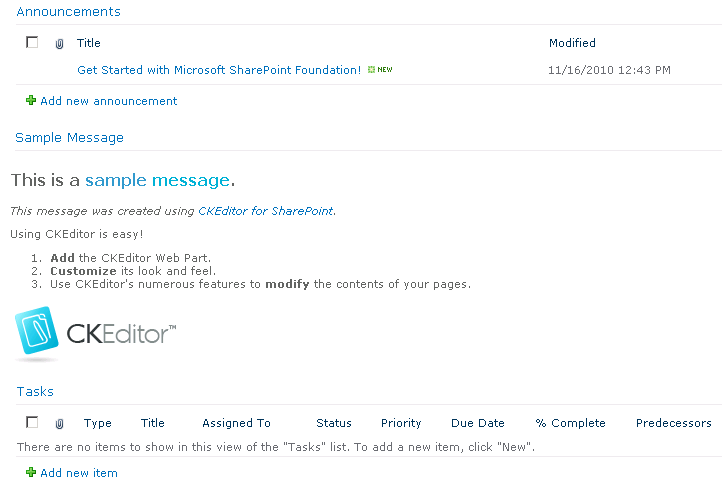
The CKEditor Web Part should now show content added in the Edit Web Part window, edited and formatted in CKEditor.
